Green Living Organics (.org)

Sustainability through healthy living

   Sep 30

Homemade Crusty White Bread

I posted a basic bread recipe earlier this month, but I thought I’d share the second one that I learned from good ol’ Betty. She says this one is crustier, but they actually turn out pretty much the same. I’m including my helpful hints at the bottom this time. You’ll have to let me know what you think.

Ingredients:

  • 2 packages of active dry yeast (about 1/2 oz)
  • 2 C warm water 105-115F (to activate the yeast)-this part is kind of tricky. Too cold & the yeast doesn’t do anything, too hot & you kill it.
  • 2 T sugar (to feed the yeast)
  • 1 T salt
  • 1/4 C salad oil (I use olive oil)
  • 6-6.5 C all purpose flour (if you’re using self-rising flour, leave out the salt)

Items that will come in handy:

  • a stand mixer or strong arms
  • a mixing bowl to mix all of your ingredients in
  • a big bowl to let the dough rise in (you can also use this bowl to measure out your flour in if you want to make sure you don’t lose count in the middle of the action)
  • two loaf pans or a big cookie sheet
  • a rolling pin
  • a big clean surface to roll out your dough on
  • a clean towel to drape over the rising dough
  • lots of measuring devices
  • a brush for the butter
  • wire cooling racks

I’m going to assume you read the first recipe or the back of your yeast packet with the “how to” on dissolving yeast. It’s easy, just add water. Put all of your ingredients (but only half the flour) into a big bowl and mix until smooth. Add enough of the remaining flour to make the dough easy to handle (not a sticky mess, these aren’t biscuits)

Knead the dough on a lightly floured board (or with the dough hook in your stand mixer) until smooth and elastic (8-10 minutes). Put it in a big bowl, brush the top with oil and let rise (covered) until double (only 45 minutes for this one).

Punch it, divide in half, and roll it out into a rectangle (or shape into balls) and shape it into that tidy little rolled rectangle with all the seams sealed and put it into a greased pan seam side down. Brush those loaves with salad oil and let rise another hour (again, double).

These bake at 400F for 35 minutes and will again sound hollow when done.


Some alternatives:

Betty suggests braiding it (divide it into 4, then divide each 4th into 3 strands, make some dough snakes and braid those pieces). Braided bread only rises for 30 minutes and cooks at 375F for 30 minutes.

I’ve also got a little note in my cookbook (on a hand written post-it “note to self” style) that for fluffier bread, I should let it rise 1.5-1.75 hours the first time, then shape it and let it rise only 20-30 minutes the second time. Then I leave it in the oven while the oven pre-heats (to finish rising) and cook it for 30-40 minutes. Sounds like a fun thing to try if your bread is too dense.


Helpful hints:


A loaf pan with a lid will give you a nice even crust and a denser bread.

Loaves in a pan:

  1.  To shape loaves: roll the dough into an 18×9 inch rectangle and then roll it up from the short end (for a cinnamon loaf or other loaf with swirl of yummy inside, this is when you put the goodies inside and roll them up). When it’s all rolled up, press the ends to seal and fold the ends under, putting the seam side down in the greased pan.
  2. When baking, stagger the loaf pans on the bottom shelf of the oven so they do not touch each other or the sides of the oven. The top of each pan should be level with or slightly above the middle of the oven.

Round loaves on a baking sheet:

  1. Shape and round the dough into a slightly flattened ball, but don’t tear or pull the dough.
  2. If baking round loaves on a baking sheet, put the sheet on the center rack of the oven. Stagger the loaves on the baking sheet

Applies to both kinds of loaves:

  1. For a soft crust, they say brush the loaf with shortening and cover with a towel for a few minutes, but I’ve heard that putting a pan of water under the loaf pan (on the next shelf down) will help that, but I always forget. My bread recipes all have crispy, hard crusts (which I love), but Nathan would prefer loaves with softer crust for sandwiches.
  2. To test the doneness of your loaves, tap them and listen for a hollow sound.
  3. When they’re done, remove the loaves from the pans right away and cool them on a wire rack.

   Sep 27

Are Allergies Ruining Your Fall? (or Spring or Life in General)

My mom has terrible allergies and has since childhood. Every fall and spring her eyes are itchy and her head hurts and she comes down with bronchitis and a sinus infection at least twice every winter. She can’t have any pets with fur or feathers and probably should avoid scales as well. She has food allergies from chocolate to green beans to peaches and a whole lot of places in between. Pile this up with her chemical sensitivity, and travel is a real chore. In the past she has needed at least a week of recovery for any hotel stay.

This summer my mom and I traveled for 13 days in July and August. We were all over the place in hotels, eating out and driving (did I mention the exhaust and the cleaning chemicals at the gas station can set her on a coughing fit). It was a bit scary, heading out into the wide world with my mom, Allergy Queen. Who know when I would have to start carrying her.

Luckily, last year my mom started taking alfalfa to fight her allergies. It has done wonders! She was able to keep up (despite reminding me on several occasions that she’s sixty – as she helped load and unload a car full of camera equipment and ran a headshot booth for 12 hours a day 4 days in a row).

After we got home, I was waiting for the stuffy-headed call, but it never came. She didn’t get sick at all! She was able to go home and get back to work. And even now, as the allergens are driving everyone crazy, she is right as rain. I’m sure the 40+ pounds she’s lost on the Cinch Plan has helped, but losing weight doesn’t keep your eyes from itching.

Let me know if you want to know more about my mom’s amazing, first ever, allergy-free fall! And definitely try Alfalfa (click here for a coupon)


   Sep 25

Shaklee Opportunity

So you read my post about how awesome Shaklee is for the environment, and you’ve seen my many posts about how great their products are. Are you curious about their business model? When you sign up to sell Shaklee, you get a team, you get Shaklee University, you get all kinds of brochures and iPad apps and such to help you share the products. You also get great health and when your friends and family see the difference, Shaklee comes up easily in conversation. And it’s great to be able to help them. But Shaklee also knows that you need to earn a living to pay for your house, and we can’t live off of Vitalizer (although we might be able to live off of Vitalizer + Cinch), so they have a great earning programs with fantastic bonuses. I love this handy chart of what it takes to be what level and what you get when you’re there. Notice how you can get a car payment pretty quickly, and they give you more if you get a hybrid.

Click to see it bigger.

Then there are the other incentives like trips and bonuses and such. My mom & I have decided we’re going to Kenya next year, and Shaklee is paying for it!

And while Shaklee is paying for us to go to Kenya, they’re also paying for children to go to school. For every member who goes to Kenya with Shaklee, they’re also paying for 1 child to attend a year of school! Another bonus of going to Kenya is that we’ll be double qualified to go to the Mayan Riviera which means we get to take 4 people each!

Plus we’re going to win a trip to Las Vegas AND a trip to the home office in San Francisco. Again, paid for by Shaklee.

On our way to all of our winnings, we have the opportunity to earn fantastic bonuses.

So I get to share my Shaklee story, help others, use great products, and go on fabulous trips with the possibility of fantastic bonuses and a car of my choosing.

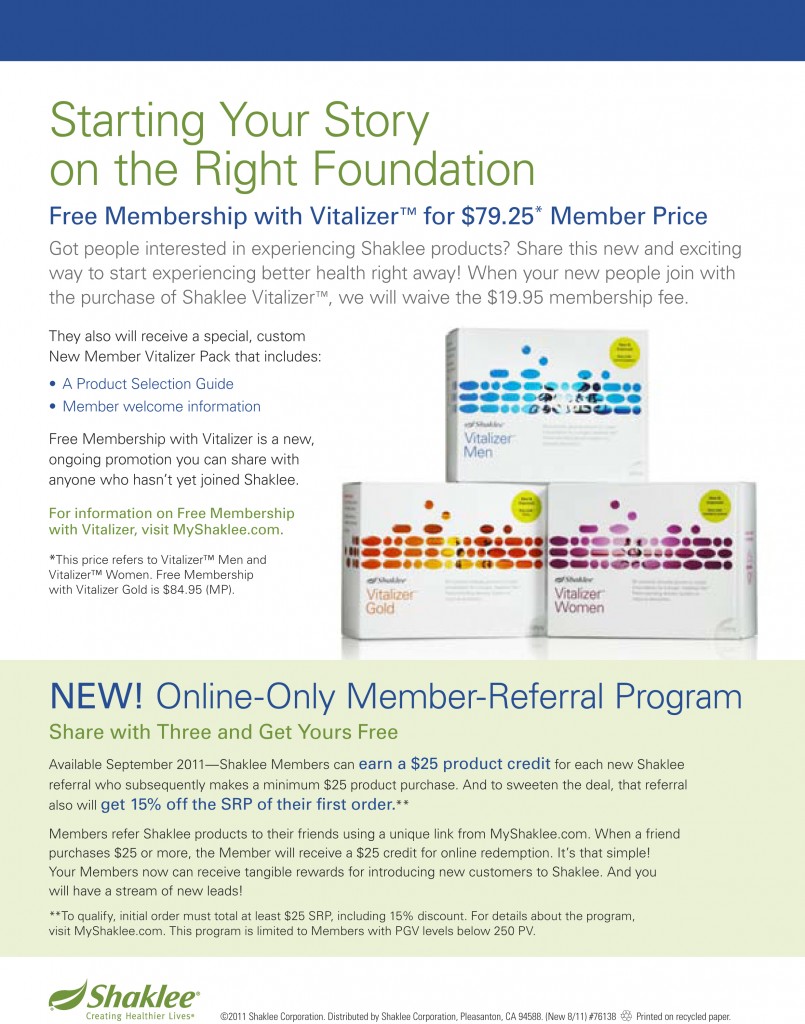
And if you aren’t interested in getting in on the business after all of that, you can become a Member for free with an order of Vitalizer. And with that Member status, you save 15% off all orders! And we have a great referral program too. It’s a win win win.


   Sep 23

Greener wedding planning

I’ve been a wedding photographer for 10 years, so I’ve seen all kinds of weddings from ginormous to small and intimate. When Nathan & I got married, we wanted something fun, simple and non-traditional. Who wants to go to work for their wedding, right! We were pretty green at the time, but not quite as conscious about the possibilities of a Green Wedding. In fact, Green Weddings have become incredibly popular now, and I have to say, I’m pleased as punch to see how many of our choices land our wedding well into the Green category.

First off, we had the whole thing at one location, our friends’ house. They have about 6 acres surrounded by woods. In the middle is their vegetable garden and right behind the house were these awesome trees that we got married under. Nathan & his friend built a cool platform for us to stand on using wood from the old barn on the property. We bought and prepped all of the food (we hired someone to run the grill and keep the tables stocked) and saved all of the leftovers to eat the next week.

I made the bouquets and boutonnieres which was a bit of a pain, but I kept them all pretty simple. They weren’t as gorgeously elaborate as many I’ve seen, but I thought they were perfectly sweet and Nathan seemed satisfied (he’s the one with the picky design eye). Our center pieces were pots with sand and zebra grass from Nathan’s mom’s house. After the rehearsal dinner, we had a bunch of friends over and built them together assembly line style.

We were also green on the invitations. Nathan & I had our engagement portraits made by a commercial photographer friend of ours. We took those shots and Nathan designed an awesome postcard with the pertinent info and a link to our website which had more details like maps and such. We did a 100% electronic RSVP system requesting them on the website, through email or over the phone. I tracked it all on the computer, no paper print outs to lose. :) Then for our thank yous, Nathan took a shot from the wedding and designed another awesome postcard with room on the back for us to write lovely things about the gifts people sent. We got so many complements on our invitations and our thank you cards! In fact, we still go to some of our friends’ houses and see them on the refrigerator 5 years later! (and no, I’m not talking about my mom and my grandmother, although they have them up on their fridges too).

In fact, the least green thing about our wedding, I think, was the fact that I had 2 dresses. See, in my ideal world, I was getting married in the sundress from the top photo. It’s super cute eyelet cotton, and I have worn it several times since our wedding. I’m just too practical to buy a dress to only wear once! Especially a dress that is that expensive! And I spent $200 on that sundress because it was going to be my wedding dress. But Nathan wanted to wear a suit (which we bought because he didn’t own a suit at the time, and I think it looks super snazzy on him!) which may have left me looking a bit too casual, and my mom was appalled that my wedding dress would be something I would wear over and over. She wanted it to be more special. I have to say, it does photograph nicely. We bought the fabric and had it made by some lady who did an okay job, but as a former seamstress (I worked in the costume shop in college), I would have done some things differently. But my mom was aghast at the idea of me making my wedding dress (she worried about the stress and my ability to procrastinate, and she was probably right). So I have two dresses which sort of un-greens things. But I did make that bouquet! Doesn’t it look nice?

But for some redemption for my un-green dual dress situation, my best friend and another dear friend (and awesome blogger) and I all got married a month apart, so we had a group bachelorette party which was a blast! We didn’t really share much actual wedding stuff because we were all so DIY and each of us limited what we used to things our guests took home (like apples for wedding favors and homemade mini-Jack o’ Lantern centerpieces) or that we kept as keepsakes. We were a group of green brides before the term was even popularized. My friends are very trend setting.

It’s been 5 years and we still don’t have our album (our friend photographed the wedding, a perk of being in the industry and friends with other wedding photographers, and gave us the rights to all of the pictures, so it’s all our fault, not hers at all), but I’m actually kind of glad we’ve waited. I finally found a green album company with Eco-ratings for their albums (you can go pretty green or full-on Eco). It was something I’d been looking for to offer to my wedding clients, and I’m totally going to get one of them for us too! We just need to take the time to design the thing. Sigh. 😉

For more suggestions on Green Weddings, you can check out this blog post by the Broke-Ass Bride.


   Sep 19

What is Shaklee

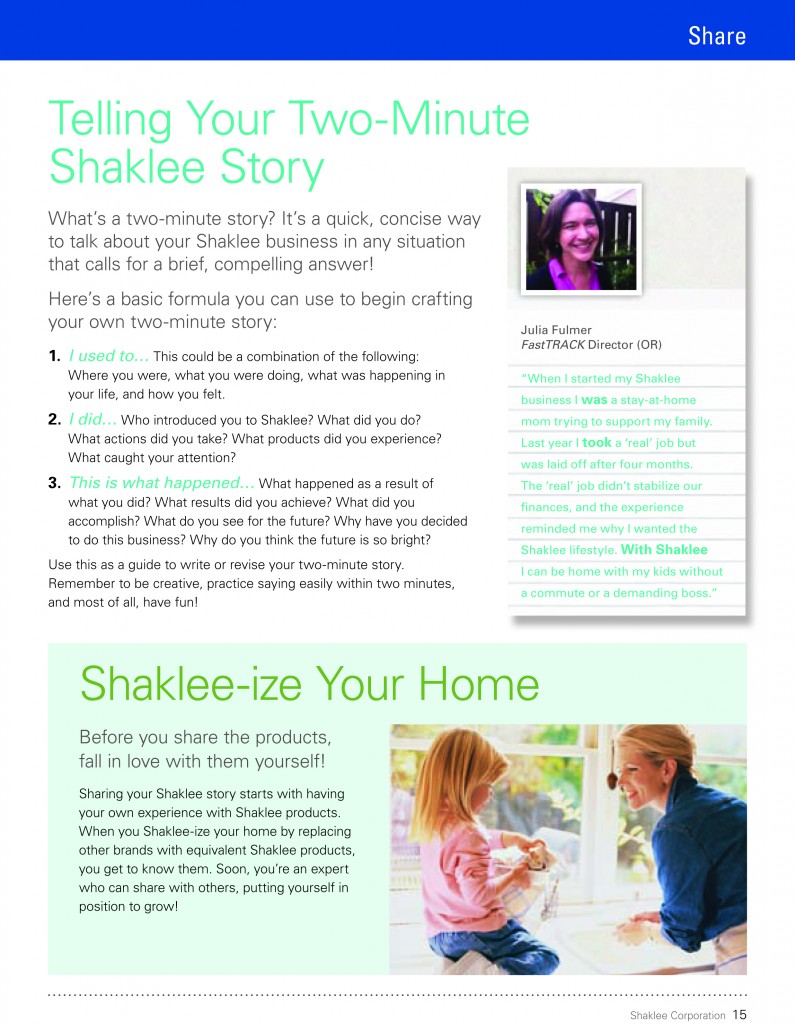
So a lot of people ask me, what is this Shaklee stuff and why do you believe in it? Well, I believe in the products because they work, and I believe in the company because they share my core values. Shaklee’s motto is Always Safe, Always Works, Always Green. They test all of their products and retest and then test them again. They do 1000 tests on each batch of their Vitalizer to make sure it’s 100% pure. If it isn’t on the package, it isn’t in the product. I’ve seen the difference their products can make in my life and especially in my mom’s life. But I continue going back to the core values. I found this presentation in my Shaklee materials, and I thought this might be the best way to explain why I’m so passionate about Shaklee. (click the images to make them bigger)

It’s pretty awesome. You don’t usually find companies driven to do right because it’s the right thing to do. If you’re interested in being a part of Shaklee, email me or give me a call 404-931-7466.


   Sep 17

A special deal on Bamboo textiles, just for our fans

Have you ever touched any cloth made of bamboo? If you have, you know what I’m talking about when I say it’s the softest stuff on Earth. If you haven’t, you need to immediately go out and touch some. It’s a fabulous material, soft, beautiful and Eco friendly.

I have a friend who sells beautiful bamboo towels and sheets among other things. You should totally check her out http://deborahannbamboo.com/. And because I love you guys, I’ve worked out a great deal with her. Just use the coupon code GLO11 when checking out and you get 20% off your first order! That’s GLO (as in Green Living Organics) 11 (as in 2011). Now head over there and treat yourself and the planet right.

Bamboo Hand Towels


   Sep 15

Plant List

Something I’m always trying to do is plant “useful” plants that help each other. For the last several years, we lost our squash plants to those damn boring bugs! I really try not to kill anything, but I go on the rampage with this little bastards. They don’t live sustainably, for one thing. They go in and kill the entire plant leaving us both without squash. I HATE THEM! But onions protect against them. Go onions! Basil is supposed to help the flavor of tomatoes and parsley is good for asparagus. You get the idea. By the way, if anyone has any idea where to get “wild” asparagus, I hear it’s far superior to the grafted stuff.

Here is my list of herbs and such including edibles. Of course, my list isn’t 100% complete, but it’s a start. (M=medicinal, N=native, E=edible) There are also some notes about the uses of a few of them.

Viola spp Violets m N e
Adiantum pedatum Maidenhair fern m N
Alnus serrulata Alder m N
Anemone virginiana Thimbleweed M N
Aralia spinosa Devil’s walking stick, angelica tree, Hurcules club M N
Aruncus dioicus Goat’s beard M N
Baptisia australis Blue false indigo M N
Callicarpa americana American Beauty bush, French mulberry M N
Caltha palustris Marsh-marigold, cowslip M N
Calycanthus floridus Carolina allspice M N
Ceanothus americanus New Jersey tea, red root M N
Cephalanthus occidentalis Buttonbush M N
Corylus americana American Hazelnut M N
Echinacea purpurea Purple Coneflower M N
Geranium maculatum Wild or spotted geranium M N
Hamamelis virginiana Witch Hazel M N
Heuchera americana Alumroot M N
Impatiens capensis Jewelweed, spotted touch-me-not M N
Lindera benzoin Spicebrush M n
mitchella repens Partridgeberry/squaw vine M N
Ostrya virginiana Hop-Hornbeam M N
Panax quinquefolius American Ginseng M N
Passiflora incarnata Passion-flower, Maypop M N
Polemonium reptans Greek Valerian, Jacob’s ladder M N
Polygonatum biflorum Solomon’s Seal M N
Rhus aromatica Fragrant or stinking sumac M N
Rhus copallina Winged or dwarf sumac M N
Tradescantia virginiana Spiderwort M N
Vaccinium macrocarpon Cranberry M N
Achillea millefolium Yarrow m e garden helps herbs & composte
Agastache foeniculum Blue giant hyssop, anise-hyssop m e raised beds
Allium schoenoprasum Chives m e anti-aphid spray
Aloysia triphylla Lemon verbena m e pots
Althaea officinalis Marsh mallow m e
Anethum graveolens Dill m e
Angelica archangelica Angelica m e
Anthriscus cereifolium Chervile m e raised beds
Artemisia dracunculus sativa French Tarragon m e raised beds
Borago officinalis Borage m e raised beds strawberries
Calendula officinalis Calendula m e
Camaemelum nobile Chamomile m e
Carum carvi Caraway m e
Coriandrum sativum Cilantro, coriander, chinese parsley m e
Curcuma longa Turmeric m e pots
Cymbopogon citratus Lemongrass m e pots
Dianthus Pink Dianthus m e attracts bees
Foeniculum vulgare Fennel m e
Humulus lupulus European hops m e
Hyssopus officinalis Hyssop m e raised beds
Inula helenium Elecampane m e
Laurus nobilis Bay m e pots
Lavandula Lavender m e
Levisticum officinale Lovage m e
Marrubium vulgare Horehound m e attracts bees
Melissa officinalis Lemon balm, Melissa m e attracts bees
Mentha Mint m e attracts bees
Monarda didyma Bergamot, Bee-balm, Oswego tea m e
Myrrhis odorata Sweet Cicely m e
Myrtus communis Myrtle m e pots
Nepeta cataria Catnip m e raised beds
Ocimum Basil m e
Origanum majorana Sweet Marjoram m e pots
Origanum vulare Oregano m e
Pelargonium Geraniums m e pots
Petroselinum crispum Parsley m e
Pimpinella anisium Anise m e
Primula veris Cowslip m e
Rosa Rose m e
Rosmarinus officinalis Rosemary m e
Salvia Common Sage m e
Sambucus Elder m e
Sanguisorba minor Salad burnet m e
Satureja Summer & Winter Savory m e
Silybum marianum Milk thistle m e
Tanacetum balsamita Costmary m e
Thymus vulgaris Thyme m e raised beds tomatoes, potatoes, eggplant
Zingiber mioga Japanese ginger m e pots
Zingiber officinale Ginger m e pots

   Sep 10

I miss my yard

Before we left Knoxville, I made a great plan for our yard. We’d worked several years to enact the plan and had made some great strides. I was working on turning our yard into a haven of edible, medicinal & otherwise useful plants. I was also working on keeping it native (or at least non-invasive). I cross referenced a list of edible plants as well as medicinals with my list of native and invasive species. My plan was to plant everything I could outside in the yard with plants I wanted that aren’t locally appropriate in pots in the house. I was striving for an English Garden style front yard with a short white picket fence to provide some visual delineation between our yard and our neighbors’ as well as to allow Alfred access to the front without having to chase him up the hill. Some plants went into the ground, but the more rampant growers were be confined to raised beds.

yard

Sadly, we didn’t get it all done. And we made some changes along the way. We never did get the fence up or the melons in the front. We nixed most of the paths, and the front mint bed was going to be a raised strawberry bed instead. I did plant mint in front of the house which had gotten well established and provided many a mojito.

The cherry tree died after one year. It was pretty tragic. And someone keeps taking all of the apples and peaches before they’re ripe. Not sure if that’s been critters or urban foragers. I’m hoping for critters because otherwise that’s just rude!

We lost most of the raspberries last summer during a long trip. The blackberries are going nuts, though. I’m finally understanding why every time I tried to find out the best way to take care of them I got “mow them down and set them on fire.” Those things just keep spreading. But the berries have been tasty. We also added another blueberry bush, but after 3 years, they still haven’t produced anything substantial.

We never got the porch/patio area built, and never got the grapes in the ground. We built the base for the shed, but we hadn’t gotten the walls up yet. And I never convinced Nathan to replace the grass with thyme.

Despite all of our shortcomings, we enjoyed some wonderful home grown food. Our biggest hurdle was our travel schedule. We were too ambitious for our time available. But now we’ve learned so much. Where we went wrong and where we went right. I’m looking forward to getting settled in our new space and start again.


   Sep 08

Yummy Sandwich Bread

I’ve been working toward a bread recipe that Nathan will approve for sandwich purposes. I’ve modified several recipes to make tasty bread for eating & dipping in olive oil or making bread bowls for soups, but none have passed Nate’s high sandwich bread standards. They’ve been too dense or the crust is to hard or I just got a little too weird with the substitutions.

Well, I think I’ve found one that works! I got this recipe from the Food Network and made only a few changes. It’s a bit more complex, but it felt really simple. This makes 1 loaf. And without further ado:

Ingredients:

2 C + 2 T Buttermilk

3 T unsalted butter

2 T sugar

1/4 oz active dry yeast

5 C unbleached all-purpose flour

1 T + 1 t salt (I have coarse sea salt that I pounded a bit with our mortar & pestle)

Extra butter for greasing bowl & loaf pan

Stuff you’ll need/want:

KitchenAid Stand Mixer (or you could knead it by hand)

Really big bowl (greased)

Kitchen towel (wide enough to go across the bowl)

Loaf Pan (9×5) (I prefer stoneware)

Wire cooling rack (I like the ones with the small grid. They provide the best support)

Hot mats (duh)

Oven (also duh) with the rack placed in the center.

Directions:

Combine the milk, butter & sugar in a pan and cook over medium-high heat, stirring until butter is melted. The buttermilk may start to chunk up and separate (like you’re making cheese), and it may totally gross out your significant other. Just reassure them that it will all come together in the bread and taste great. Once the butter has melted, you need to get the mixture down to 110-115 degrees F so you don’t kill your yeast. I found that a candy thermometer hooked on the edge of the pan so it’s suspended (not resting on the hot bottom) works great! This is going to take a while. So move on to the dry ingredients while you wait. Once you’ve hit that magic temp, dump your yeast in and give it about 10 minutes to get all foamy. If it doesn’t get foamy, your yeast is dead and your bread will be flat and gross. This doesn’t mean big puffy bubbles like a bubble bath, more foamy like that gross stuff you see on lakes sometimes.

While you wait, mix your flour & salt together and oil up the bowl you’ll use to let everything rise (and by oil, I mean butter). I suggest a KitchenAid mixer (or another brand if it suits your fancy) for this whole process. If you don’t have one, I’m sorry. It’s a lot more work for you. Of course, you’re actually getting some exercise and get to play in dough, so I don’t feel too sorry for you.

Once your milk/yeast mixture is foamy, pour it into the bowl of flour and turn on the mixer (or get your hands in there and start kneading), until the mixture is kind of ragged.

If you’re using the mixer, just keep on mixin’. If you’re not using a mixer, dump that puppy on to a well-floured work surface and knead until it’s soft & elastic (about 10 minutes). Either way, once your dough is good and elastic, put it into the big greased bowl. I like to rub the whole lump around and then flip it so that both sides are greased. Be sure to take a taste of the dough because it’s FRIGGIN’ DELICIOUS! Then put a kitchen towel over the bowl and put it in a warm spot to rise until about double in size (about 2 hours). Suggestion on warm spot: your oven with the light on. It actually gets pretty darn warm in there.

When you’re about ready to pull your puffy dough out of the warm spot, take a moment to butter your loaf pan, then move the dough onto a work surface to shape it. I know my other recipes tell you to punch the dough, but you may want to refrain from such violence with this peaceful bread. It needs no punching and no rolling out. No tools necessary, just your hands. Gently, sweetly ease your dough into a long oval, about 10″ long, that is. Don’t roll this bread like a cinnamon loaf. Nope, this is a folder (again, gentle, peaceful bread). Fold it into thirds lengthwise and overlapping. Press down the exposed seam to seal it. Place it seam-side down into the buttered loaf pan, cover it with that kitchen towel and put it back in that warm spot. Give it about 2-2.5 hours to rise (supposedly about 1.5″ above the edge of the loaf pan, but I think it needs the full rise time to get fluffy enough). If you’re using the oven, take the bread/pan/towel combo out and let it finish rising while you preheat the oven to 400 degrees F (be sure to move that oven rack to the center before you preheat. It’s a real pain if you wait).

Remove the towel and LIGHTLY (I tell you, this is gentle bread) brush the top of the dough with warm water. You’re supposed to cut a slit down the center, but that really just made the loaf kind of flat & weird shaped on top, so I may try without the slit sometime. If you do cut a slit, use a sharp knife and make it 1/4 inch deep. Bake on the center rack until golden brown (about 30 minutes).

Remove the loaf from the pan and put it back in the oven, center rack for about another 15 minutes. The loaf should sound hollow when lightly rapped on the bottom & top. If it sounds at all not hollow, put it back in for a while longer. If you use an instant read thermometer for these purposes, it should read 190 degrees F in the center. Make sure to bake your bread long enough. Slightly over done is better than not done and slightly gooey and definitely gross.

You’re supposed to let this thing cool completely before slicing. Yeah right! I had a slice cut as soon as that puppy touched the counter (on the cooling rack, of course). The crust was disappointingly hard to cut neatly, but the bread was awesome (like all bread fresh from the oven). After it had cooled, I wrapped it in plastic wrap (and if anyone knows a good, earth-friendly alternative to this stuff, please let me know! I hate it, but it’s so darn useful!) and the next day, it cut like butter. Such smoothness was incredible! I cut thin slices for delicious sandwiches that came out perfect every time!

Alternative:

They suggested whole milk, but I was out & had buttermilk. I’d also wanted to make sourdough but didn’t want to wait on the starter. The buttermilk gave the loaf a slightly sour flavor, so it’s like sourdough without the starter.


   Sep 04

Basic Bread Recipes

I have had several friends ask me for my bread recipe, so I’m finally sucking it up and getting it posted as promised. The recipes I’ve based mine on are from Betty Crocker’s Cookbook from 1972.

To start with, here are a few hints about baking bread in the oven (in a loaf pan even! We don’t own a bread machine).

Loaves in a pan:

  1.  To shape loaves: roll the dough into an 18×9 inch rectangle and then roll it up from the short end (for a cinnamon loaf or other loaf with swirl of yummy inside, this is when you put the goodies inside and roll them up). When it’s all rolled up, press the ends to seal and fold the ends under, putting the seam side down in the greased pan.
  2. When baking, stagger the loaf pans on the bottom shelf of the oven so they do not touch each other or the sides of the oven. The top of each pan should be level with or slightly above the middle of the oven.

Round loaves on a baking sheet:

  1. Shape and round the dough into a slightly flattened ball, but don’t tear or pull the dough.
  2. If baking round loaves on a baking sheet, put the sheet on the center rack of the oven. Stagger the loaves on the baking sheet

Applies to both kinds of loaves:

  1. For a soft crush, they say brush the loaf with shortening and cover with a towel for a few minutes, but I’ve heard that putting a pan of water under the loaf pan (on the next shelf down) will help that, but I always forget. My bread recipes all have crispy, hard crusts (which I love), but Nathan would prefer loaves with softer crust for sandwiches.
  2. To test the doneness of your loaves, tap them and listen for a hollow sound.
  3. When they’re done, remove the loaves from the pans right away and cool them on a wire rack.


And now for the recipe:

The basic white bread recipe makes 2 loaves (or a bunch of bread bowls for soups):

  • 2 packages of active dry yeast (about 1/2 oz)
  • 3/4 C warm water 105-115F (to activate the yeast)-this part is kind of tricky. Too cold & the yeast doesn’t do anything, too hot & you kill it.
  • 2 2/3 C warm water
  • 1/4 C sugar (to feed the yeast)
  • 1 T salt
  • 3 T shortening (if it looks like crayons, it’s gone bad. Trust me. 😉 )
  • 9-10 C all purpose flour (if you’re using self-rising flour, leave out the salt)
  • soft butter or margarine

Items that will come in handy:

  • a stand mixer or strong arms
  • a mixing bowl to mix all of your ingredients in
  • a big bowl to let the dough rise in (you can also use this bowl to measure out your flour in if you want to make sure you don’t lose count in the middle of the action)
  • two loaf pans or a big cookie sheet
  • a rolling pin
  • a big clean surface to roll out your dough on
  • a clean towel to drape over the rising dough
  • lots of measuring devices
  • a brush for the butter
  • wire cooling racks

So to start, you have to get your water to the right temperature. I do this by heating up a pan of water until it’s boiling then dumping it into a measuring cup and testing the temp with a candy thermometer. If my water is too hot (which is usually is) I pour in small increments of cold water and swirl it with the thermometer until the temp is just right. Then I measure out my 3/4 C for the yeast to get the party started. My recipe says to just throw a bunch of stuff in once the yeast is dissolved, but I prefer to dissolve the yeast then dump in the sugar and let the yeast proof (double in size) then dump in the other stuff. So let’s do that.

Once your yeast is proofed, put the rest of the water, salt, shortening & 5 cups of flour in your bowl (this means everything but half the flour is all mixed together. Pretty easy so far, yes?) Now I’m going to do something that may annoy some folks, but I have a stand mixer and I’m lazy. You don’t have to have a stand mixer, but since I’ve only been baking bread since I got one (a gift from my mom & boyfriend, now hubby) and I love it, I don’t know how to tell you to mix this stuff without it. I guess knead it and mix it by hand or with a hand mixer. Or save up and buy a stand mixer.

So, you have your fancy stand mixer, and you turn it on low with the dough hook attached (and the arm locked down. Yes I have forgotten that) and the little plastic guard thingie on to keep the flour from going everywhere (which it will anyway, but the guard helps a bit). As things mix up better, you can turn it up a bit, but this isn’t a race, so high is not our goal. Slowly add more flour to make the dough easy to handle (i.e. not a sticky pile of goop). You may need to stop the mixer and pull the dough off the hook as it tries to creep up into the mixing mechanism and get grody & greasy. If you miss that and it gets way up there, just pull that little bit off and compost it. Dough also can clean out nasty bits that may have gotten up there, so your mixer may end the day cleaner, but I don’t recommend this as a regular cleaning method.

Apparently, Betty Crocker is pretty hard core and she suggests you turn the dough by hand onto a lightly floured board and knead it until its “smooth & elastic” which takes her about 10 minutes. I do all of that in my mixer while I grease a bowl which is our next step. Gather up your dough and dump it into the greased bowl. Swirl it around to get the bottom of the dough ball greased, then flip the dough over so the other size can get greased up too. Cover it with the towel and let it rise in a warm place until double (which takes about an hour). A hint for finding a warm place, I preheat our oven to the lowest setting (right around 170 or 200 F, I think) then I turn it off and put the bread in there to rise. You’ll know the dough is ready when an impression remains.

Now my favorite part, punch the dough down (yes, you can actually punch it with your fist. It’s fun!) Divide the dough in half and roll out each half to an 18×9 inch loaf. Then karate chop the short sides (those are the sides where you see the rolling, smooshing them together to get a good seal. Fold those ends under and put the whole thing into a greased loaf pan. I like to grease the outside of the bread too, which is good because that’s how Betty rolls as well. Now you have to wait another hour while it rises againg (also to about double).

Take the loaves out of the oven while you preheat it (or don’t. I sometimes preheat them with it if I’m feeling like it) to 425F. Make sure your loaves are good and centered, try out that pan of water thing if you want a soft crust (I can’t vouch for it. That technique is hearsay to me since I haven’t tried it yet) and make sure nobody’s touching (like you and your little brother in the back of the car on a long road trip to granma’s). Bake the loaves for 30-35 minutes until a deep golden brown and they make a hollow sound when you tap them (pretend you’re politely knocking at the door of a stranger). When they’re done, get them out of that pan asap and onto a cooling rack and be sure to brush them down with more butter (did I give the impression this was a healthy recipe?)

If you’re like me, you can’t wait until they’re cool, so dive in and be ready to burn the crap out of your mouth, but it’s oh so worth it to eat the steamy hot center out of a fresh piece of homemade bread. Besides, it’s been taunting you for a good 3 hours with it’s yeasty smells wafting throughout the house. Just don’t sue me when you sear the taste-buds off your tongue.